- 1. What is the Lamination Technique?
- 2. Basic Process of Lamination
- 3. Hidden Know-How and Artisan Insights
- 4. Pattern Design After Lamination
- 5. Fusion of Traditional and Modern Techniques
- 6. Common Failures and Solutions
- 7. Workshop Terms and Trivia
- 8. Evolution and Future of the Lamination Technique
- 9. Summary
- 10. Notes on Variability
- 11. References
Table of Contents
- What is the Lamination Technique?
- Basic Process of Lamination
- Hidden Know-How and Artisan Insights
- Pattern Design After Lamination
- Fusion of Traditional and Modern Techniques
- Common Failures and Solutions
- Workshop Terms and Trivia
- Evolution and Future of the Lamination Technique
- Summary
- Notes on Variability
- References
1. What is the Lamination Technique?
Basics of the Lamination Technique
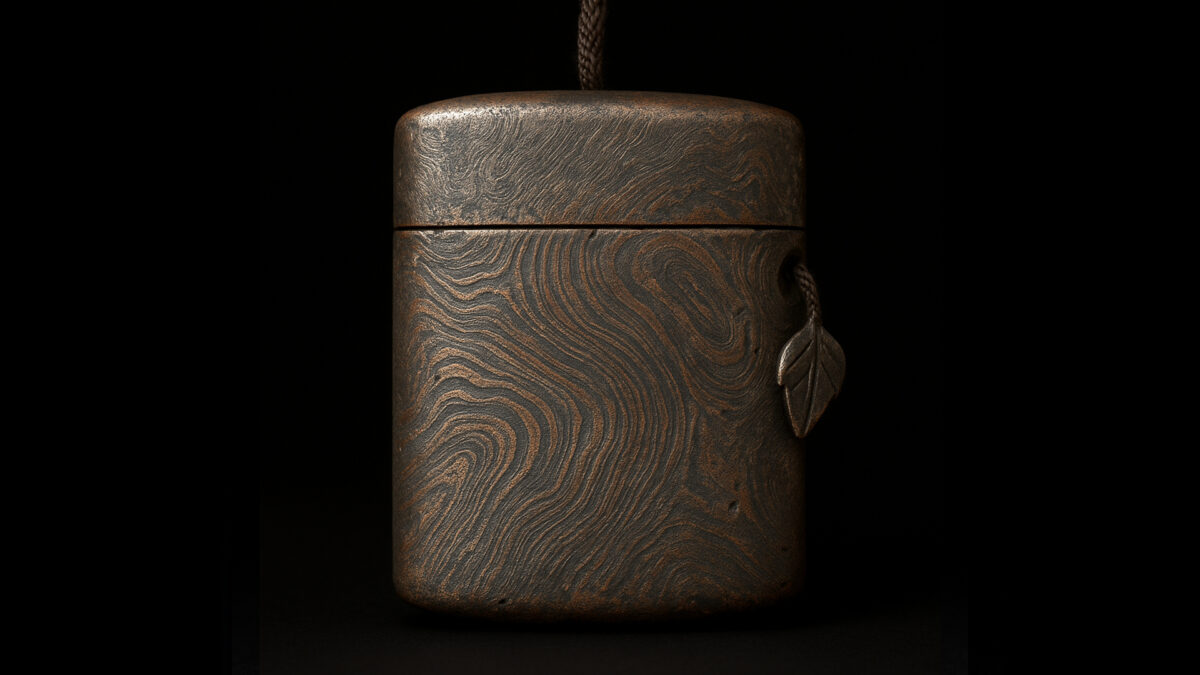
Lamination involves stacking multiple sheets of different metals in a defined order and thickness, bonding them under high heat and pressure to form a single laminated metal billet. In Mokume-gane, this billet is then carved, engraved, or twisted to create intricate wood-grain patterns.
Why Laminate?
- Unique cross-sectional patterns (wood grain, ripples, spirals)
- Improved strength and durability (compensating for each metal’s weaknesses)
- A balance between artisan intention and serendipity
2. Basic Process of Lamination
(1) Material Selection / Preparation
- Common metals: gold, silver, copper, shakudo, shibuichi, palladium, titanium
- Thickness: 0.3–2 mm per sheet; typically 10–40+ layers
- Crucial to clean oxidation and oil from the surface for bonding strength and final finish
(2) Layering and Pre-Assembly
- The sequence and layout directly affect the final pattern
- Artisan experience guides layer order, color placement, and thickness
(3) Clamping / Press Setup
- The stack is tightly fixed using annealed wire or custom clamps
- Misalignment or gaps can lead to cracking or delamination
(4) Heating and Bonding
- Uses brazing or diffusion bonding
- Heat sources include traditional charcoal, modern electric, or pressure kilns
- Temperature must be precisely controlled (typically 800–950°C)
- Overheating, underheating, or uneven heat causes failure
(5) Cooling and Inspection
- After cooling, remove clamps and clean oxidation
- Check bonding integrity via visual and hammer inspection
- Cracks, delamination, or internal voids may become visible
3. Hidden Know-How and Artisan Insights
Metal Compatibility and Arrangement
- Metals differ in expansion and melting points—order matters
- Poorly matched metals result in weak bonding
- Traditional arrangements: silver, copper, shakudo, shibuichi
- Modern additions (e.g., titanium, palladium) are still under testing
Surface Preparation Secrets
- Absolute cleanliness is key—oil or fingerprints increase risk of failure
- Variations in sanding, pickling duration, grit, and polishing methods
- Many failures are traced back to surface contamination
Clamping Techniques
- Clamping methods vary across schools and mentors
- Achieving full contact without air gaps is crucial
Temperature, Pressure, and Timing
- Each metal has specific diffusion temperatures
- A single attempt—if failed, the piece is often discarded
Addressing Cracks and Delamination
- Severe cracks often require starting over
- Minor separation may be fixed by reheating and repressing
- What is “acceptable” varies by studio and artist philosophy
4. Pattern Design After Lamination
After lamination, the focus shifts to pattern design. Layer orientation, carving angle, and depth create endless variations:
- Tree rings, spirals, ripples, dot motifs
- Even a slight change in carving drastically alters the result
- Trial-and-error, experience, and intuition are essential
Common Studio Saying
“You won’t know the final pattern until after carving.”
“It takes over 10 years to reliably predict pattern outcomes.” (Varies by individual)
5. Fusion of Traditional and Modern Techniques
- Electric kilns and presses offer precise heat and pressure control
- Some artists experiment with 3D-printed laminates
- Many artisans believe hand-laminated Mokume-gane still yields unmatched texture and character
6. Common Failures and Solutions
Cracks / Delamination
- Causes: poor material choice, dirty surfaces, improper clamping or temperature
Internal Voids / Bubbles
- Caused by trapped air; mitigated by tapping during stacking
Unexpected Patterns
- Result from misjudged layer thickness, sequence, or carving angles
Q&A
Q: Can lamination failures be repaired?
A: Often a full redo is required, but minor flaws may be salvaged with partial rejoining or creative use.
7. Workshop Terms and Trivia
- Base Metal (Jigane): Main laminated metal base
- Temporary Clamping (Karizuke): First stage of securing layers
- Heating (Yaki): Common term for bonding phase
- One-Shot: Lamination is irreversible
- Crack / Peel: Common failure terms
8. Evolution and Future of the Lamination Technique
- New combinations and metals are expanding expression
- Traditional hand techniques retain emotional and visual warmth
9. Summary
Lamination is a miraculous technique built on invisible skill and high-stakes precision. Every Mokume-gane piece embodies its layered story—crafted through heat, pressure, and the artisan’s intuition.
10. Notes on Variability
- Processes and terminology vary across studios, lineages, and time periods
- Optimal metal combinations and heat ranges are often considered trade secrets
- New methods like 3D printing are experimental
11. References
Refer to the original Japanese article for full citations and documentation.

